OffersHub lets you to create an offer in multiple ways. In this section, we will show you how to create an offer using your dashboard console. Behalf of that, you can also create offers using your Partner API, Advertiser API, import from a 3rd party network using Offer Sync API or import offers from a file.
Prerequisites
- An advertiser account in your system for your offer’s advertiser. If you don’t have one yet, it’s time for now to create an advertiser account.
- The offer landing URL provided by your advertiser
Once you’ve fulfilled all the prerequisites, navigate to “ Menu ‣ Offers ‣ Create Offer “
In this first section you can fill out the basic information of your offer.
Basic Offer Details
Advertiser: Select the advertiser for your offer from the list of advertisers accounts you have created.
Offer Name: Give a name to your Offer. Give your offer a clear name that your affiliates will understand.
Description: Brief summary of the offer. Affiliates/advertisers viewing this offer will read the description to have an idea of what is being promoted.
Preview URL: This URL should be provided to you by the offer’s advertiser. It’s the URL where affiliates can see the offer’s landing page.
Image Preview (optional): You can upload an image/icon to set the image preview of the offer. The image format could be jpg, png or gif. Resolutions must not exceed 1500*1500 and max allowed size is 2MB.
Offer Category: Select a suitable offer category from the list.
Expire Date : Here you can define the expiry date of the offer.
Offer Classification
Classifications are grouped preset labels you can apply to offers, partners, and advertisers in your network. You can have up to 300 of each classification type in your network:
In "Offer Create" option

In offer filters, admin dashboard and affiliate dashboard
- Channels
- Offer channel, such as mobile, desktop, tv ,etc
- Operating systems
- supported operating system. ex: Adnroid/ iOS
- Incentive
- Offer incent or non-incent
- Verticals
- Offer vertical. predefined Verticals: Adult, Automotive, Biz Opp, Casino/ Gambling, Coupons, Dating, Downloads/ Software, Education, Entertainment, Fashion, Finance, Forex, Games, Health & Beauty, Home improvements, Insurance, Legal, Lifestyle, Music, Other, Real Estate/ Mortgage, Shopping, Sports, Sweepstakes, Travel, Utilities.
- Conversion types
- The conversion type of the offer. Such as app install, form submit, download, Lead gen etc… all fields are pre-defined.
- Media placements
- Supported media placements, eg: banners, popup…
Offer Access Control
Offer Access allows you to set the restrictions to your offer if needed.

Public: If you select offer access to “public”, all the affiliates will be able to access the offer details and send traffic.
Required Approval: If you select offer access to “Required Approval”, affiliates will be able to see the offer on their dashboard, but they need to get approval from account manager in order to send traffic and promote.
Private: Private offers will be hidden from affiliates and they can’t send traffic. Once the offer is created, you can add the list of allowed affiliates who can see and promote the offer.
Offer Targeting
The Targeting section contains 7 various options through which you can set the targets for your offer.

- Geo Targeting: Manage your traffic by using “Include” for target and “Exclude” for non-target countries by selecting the button below Countries field. You can choose specific regions and cities in particular country as well.
- Device & Platform Targeting: You can set targets for devices according to parameters: device type and platform/OS.
- Browser Targeting: You can set targets for offers according to mobile browsers.
- Network/ Carrier Targeting: You can set targets for offers according to connection types and mobile carries such as Mobile Network, Wifi, Cable/DSL etc.
Please note that: The mobile carriers will only display once you have included/excluded countries in Geo targeting. - IP Targeting: You can set the IP targets by allowing or blocking specific IP formats.
- Traffic Targeting: You can set the target for offers based on the allowed or denied traffic types. Traffic could be banner, social media, email etc.
- Demographic Targeting: You can set the target based on gender and age.
Enforce Validation: If this option is ‘Enabled’, the OffersHub server will validate the traffic under Geo, Carrier and IP targeting rules and only the valid clicks will be redirected to advertiser’s landing page and others will be rejected.
Postback Tracking Protocol & Advertiser URL
Here you can select which postback tracking protocol your advertiser supports.

By default it would be Server Postback (S2S), however you can change the protocol as per your need from the options provided in the drop down.
The Advertiser Url will be the landing page url where the traffic is directed to.

You can add the parameters requested by your Advertiser from the macro list, which you can find in “Show Macros”.
Deep-linking: By enabling deep linking, you allow your affiliates to set redirect link to your advertisers web page or app instead of redirecting to offer default landing URL. For example, amazon want to give a 5% commission on each sale that affiliate makes. In order to make sales, affiliates may want to send user in to some product page directly instead of amazon home page. in that case deep linking helps to redirect user directly into that page.
Revenue & Payout
In this section, you will provide the details about the revenue type and payout type.

By default, OffersHub provides you four options to define your revenue type.
| Revenue per Conversion |
| Revenue per Click |
| Revenue per Sale |
| Revenue per Conversion + Revenue per Sale |
Similarly, payout types are being defined.
| Payout per Conversion |
| Payout per Click |
| Payout per Sale |
| Payout per Conversion + Payout per Sale |
You can enter the details of both as per decided with your advertiser.
Goal/Events
By default, this option would be ‘Disabled’, however you can ‘Enable’ it if you want to set a goal for your offer.
Offer Status
You can set the status of the offer as per your requirements. By default the status would be Active.

Advanced Options
You can set the additional rules for the offer by setting up the options provided to you in Advance setting options.

- Custom Currency: The default currency is your network’s default currency. Enable a custom currency option which will provide you a list of multiple currencies from which you can select as per your offer requirements.
- Redirect/Backup Offer: Enabling this option, you will be able to redirect the traffic to another offer if the cap of this offer is being reached/offer is expired or paused.
- Manual Approve Conversions: By default this option is Disabled. Enable this option to approve every conversion manually. Then by default, every conversion will be in pending status and will not be counted in billing until it is approved.
- Multiple conversions: Enable multiple conversions to be recorded per user for only one active session. An active session is created each time the user clicks on the tracking link.
- Allow Dynamic Payouts: Allow the advertiser to pass payout and revenue with postback. If passed, Offer default revenue & payout will be replaced with advertiser passed value.
- Offer Caps: You can set the limits for every offer with our Cap feature. First step is to “Enable” the Cap which will provide you the options to set limits to your offer. Once enabled, you will see 3 types of caps – Conversion, Payouts and Revenue.
- Click Session Lifespan: We can set the duration to keep the session active for particular offer.
- Manual Approval Ratio: You can set a percentage amount of conversions to be approved manually.
- Tracking Domain: If multiple tracking domains available in the system, you can select which tracking domain will be used to generate this offer`s tracking URLs. If not selected, the system default will be selected.
- Force Https: This will force redirect the traffic to https tracking link.
- Smart Groups: You can select a smart group which will add this offer into specific smart links.
Tracking URLS
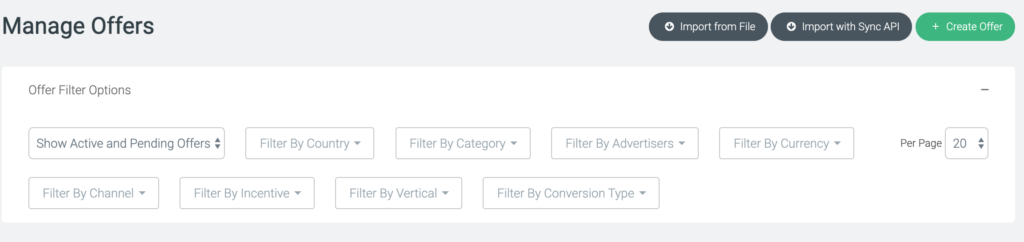
Once you have created an Offer, you can find them in the Manage Offer tab.

Here you will see all the details entered while creating an offer. You have the option to reset the targeting rules, creatives, allow/deny affiliates etc.
You can find the tracking URLS in the Tracking Codes tab.
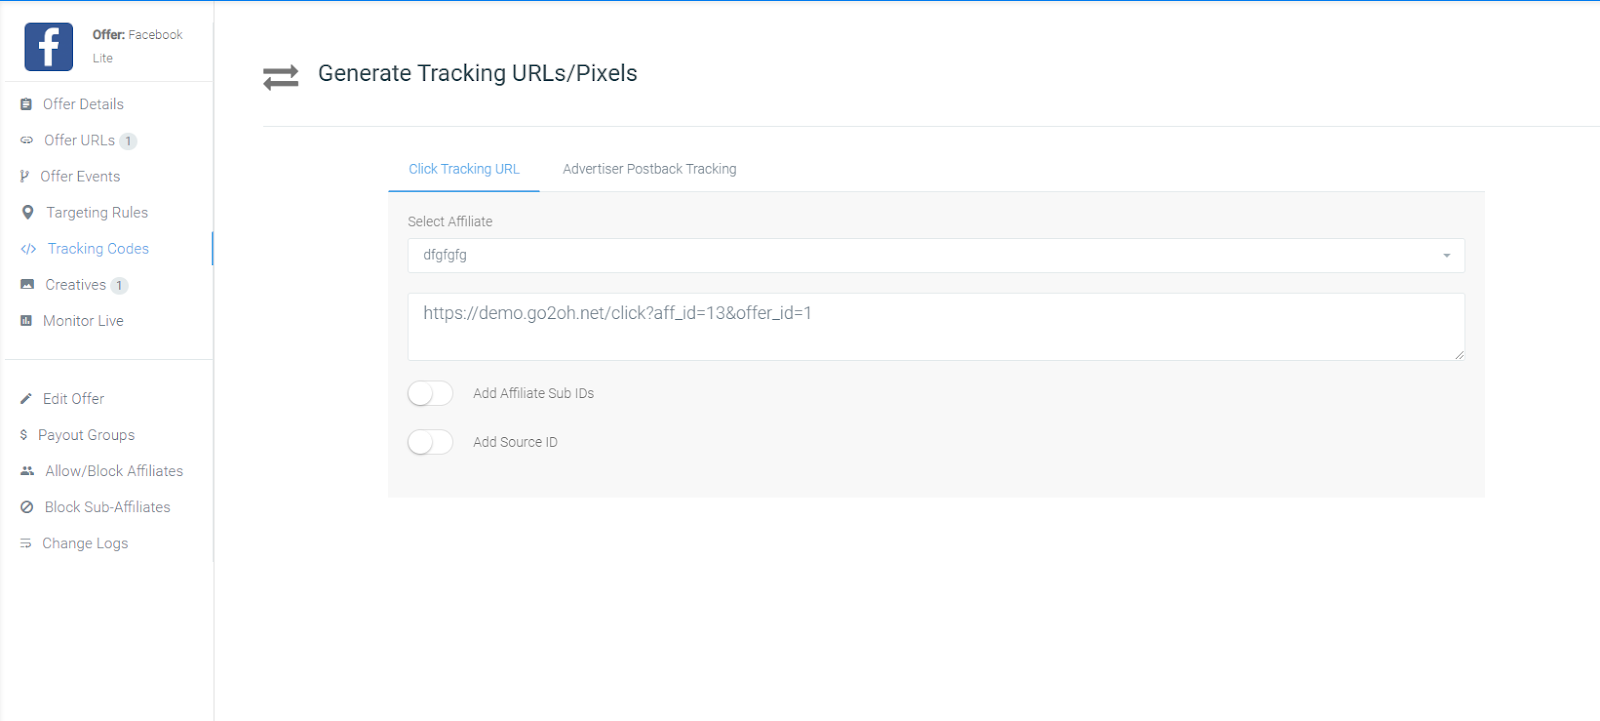
The offer tracking url will be generated in Click Tracking url. You can select the Affiliate from the drop down menu to whom this offer is going to be assigned to and the tracking link will be generated. You can add the additional parameters requested by your affiliate.
You will find the Advertiser Postback Tracking link in the tab next to Click Tracking url.
Testing a Postback with Transaction/ Click ID
Before launching any offer, it’s better to check whether it guides the information properly between your affiliate and advertiser. Checking the postback manually could be a tedious task but following the below steps will guide you to triggering a click and confirming the postback success, successfully.
1. Getting the links prepared:
You will need both, the click tracking link and advertiser postback URL to complete this testing.
You can get them in the Manage Offer > Select the Offer > Tracking Codes.
2. Open Chrome Network Log:
In Google Chrome, open a new tab or window. Then, right click anywhere on the page and select “Inspect” from the menu. In the window or pane that appears, select the Network tab and check the Preserve log box as shown below.
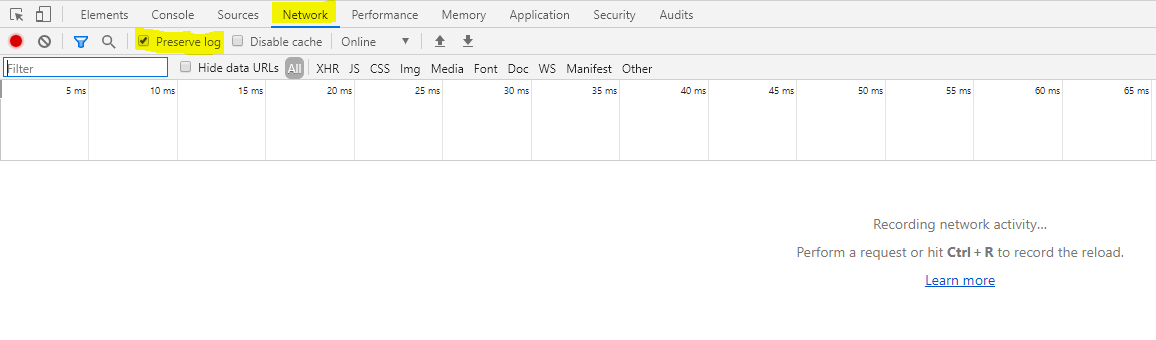
Now you can see values in the HTTP requests as they’re being passed from affiliate to network to the advertiser.
3. Triggering Click:
Paste the click tracking link from step 1 into the URL bar, then press Enter to trigger a click. Data transferred to or from your browser will appear in the Chrome tool.
The log entries that appear trace the redirect path from the affiliate’s tracking system through your OffersHub tracking link to all advertiser URLs, until reaching the final landing page.
4. Finding Click id:
You need the click session’s transaction ID to fire the test postback, in the panel to the right of your selection, select the Headers tab. This tab shows fields and their values being passed through HTTP requests.
The click ID can usually be found in a field labeled “cid”, like in the image below:
Sometimes, the transaction ID will instead be in the entry above or below the “Name” entry selected in step 3. This is perfectly normal and is caused by the differences in affiliate interactions from network to network.
5. Fire Postback:
In the advertiser postback URL from step 1, replace CLICK_ID with the click ID you found in step 4. Then, type or paste that URL in the destination bar and press Enter.
This fires a test postback from your browser and creates a conversion. Based on the results, you’ll get one of the following responses:
- “message : success” : A successful conversion.
- “message : unsuccessful” : A conversion rejected.
If your conversion was successful, then it will appear in reporting tools shortly. Your offer is ready to launch.
If your conversion was rejected, it may have an invalid, expired, or duplicate click ID. To resolve this issue, contact your advertiser to find out why the conversion was rejected.
To view successful postback tests, go to Reports > Conversion Report and to check for errors from unsuccessful postback tests, go to Reports > Server Logs.